Loading...
Loading...
Loading...
Loading...
Loading...
Loading...
Loading...
Loading...
Loading...
Loading...
Loading...
Loading...
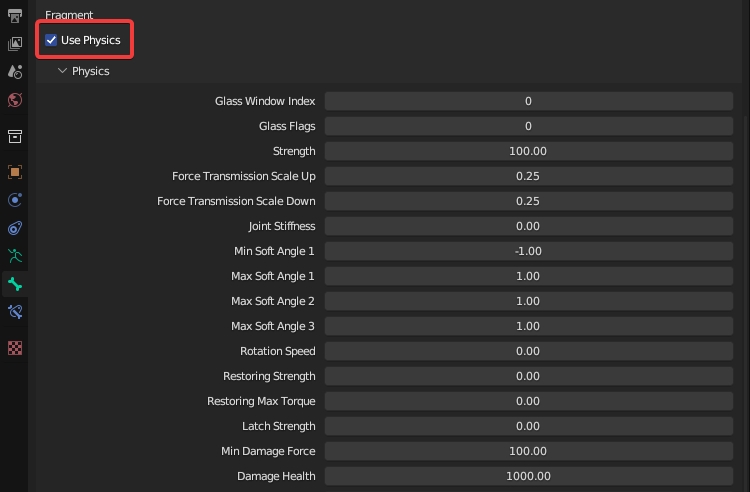
You will notice that each Fragment bone now has a Use Physics property.
Enabling this will reveal a Physics subpanel where various physics properties can be configured for that bone. The defaults work great for most use cases but feel free to tweak them to get the results you want.
If you're ever not sure what physics properties to set, import a similar model from the game and copy its physics properties.
Most importantly, enabling Use Physics is what causes the bone to react to physics. If this is unticked, any geometry associated with the bone will always remain static in-game. Usually, you'd have a bone for each separable part. That way, all parts of your Fragment will act independently of each other. See the Prop Setup page for an example (vehicles also have separable parts but the bone hierarchy is usually much more complex).
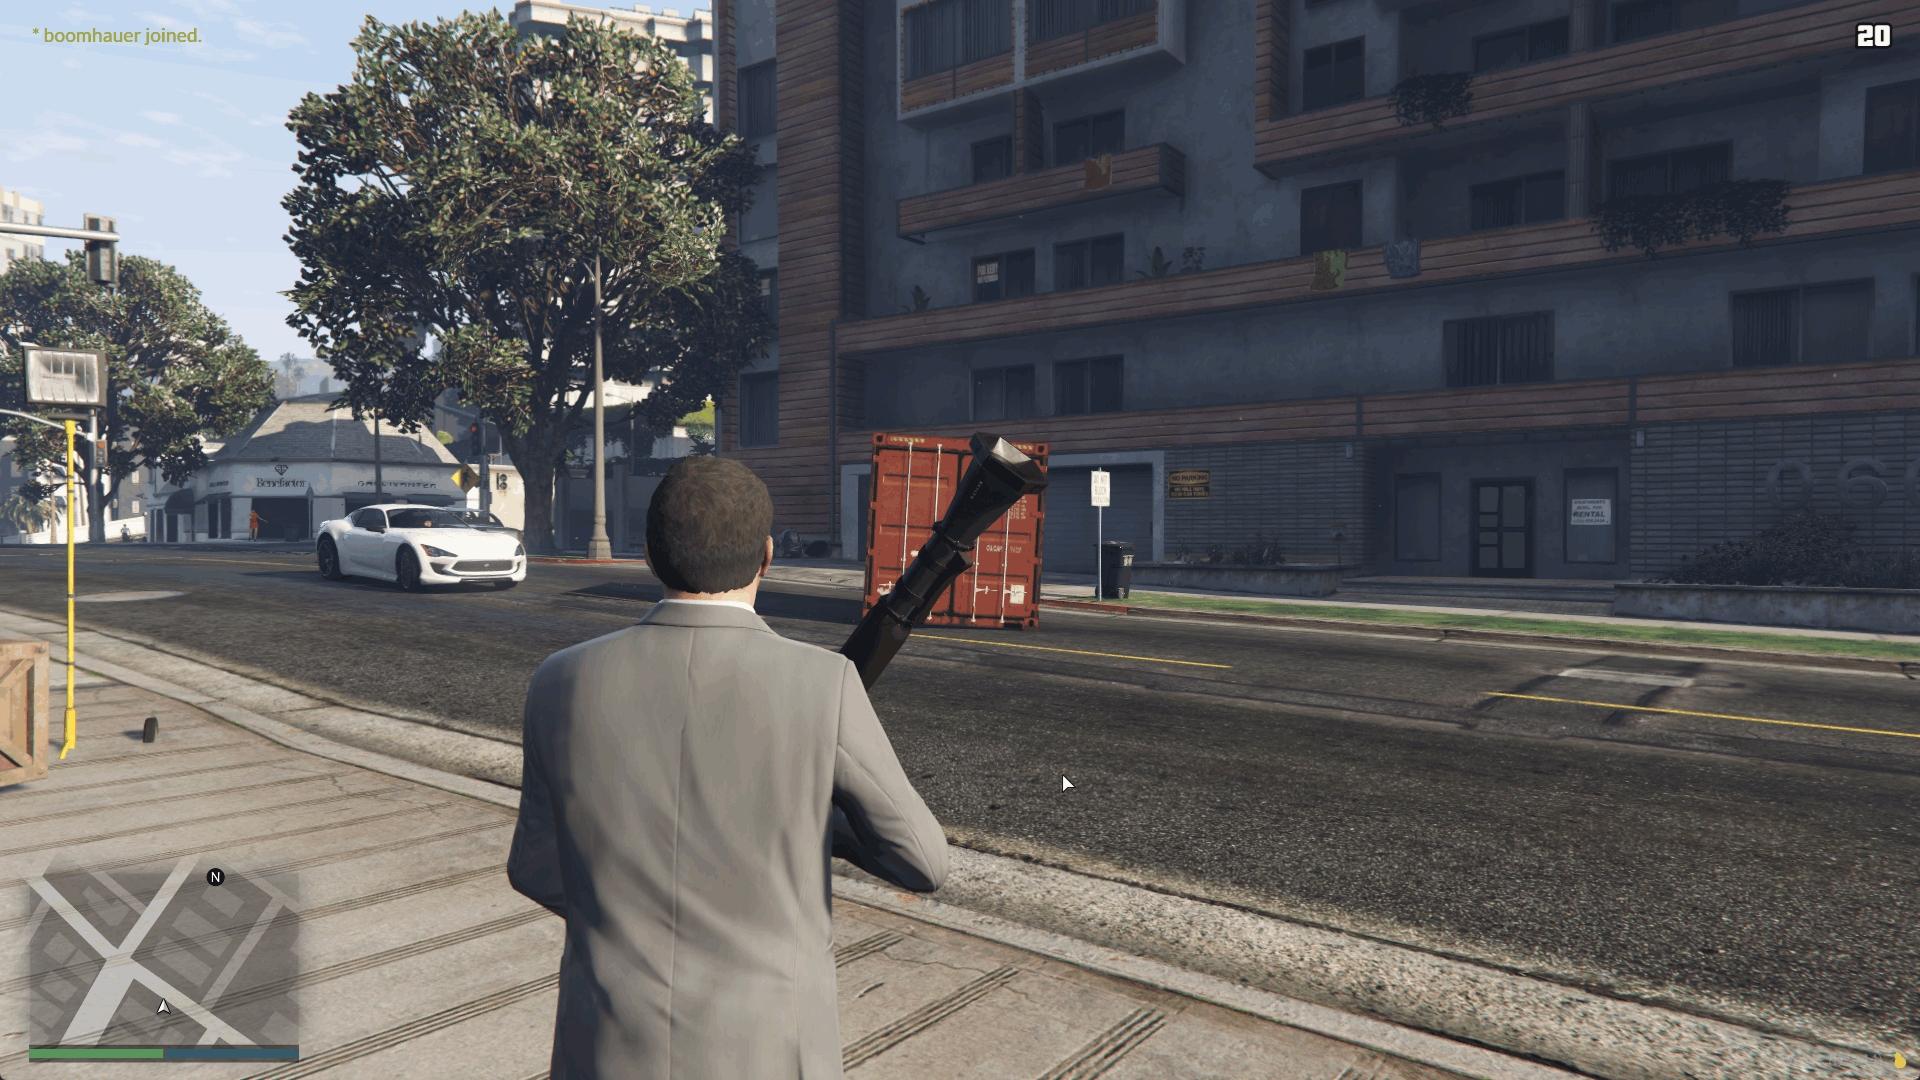
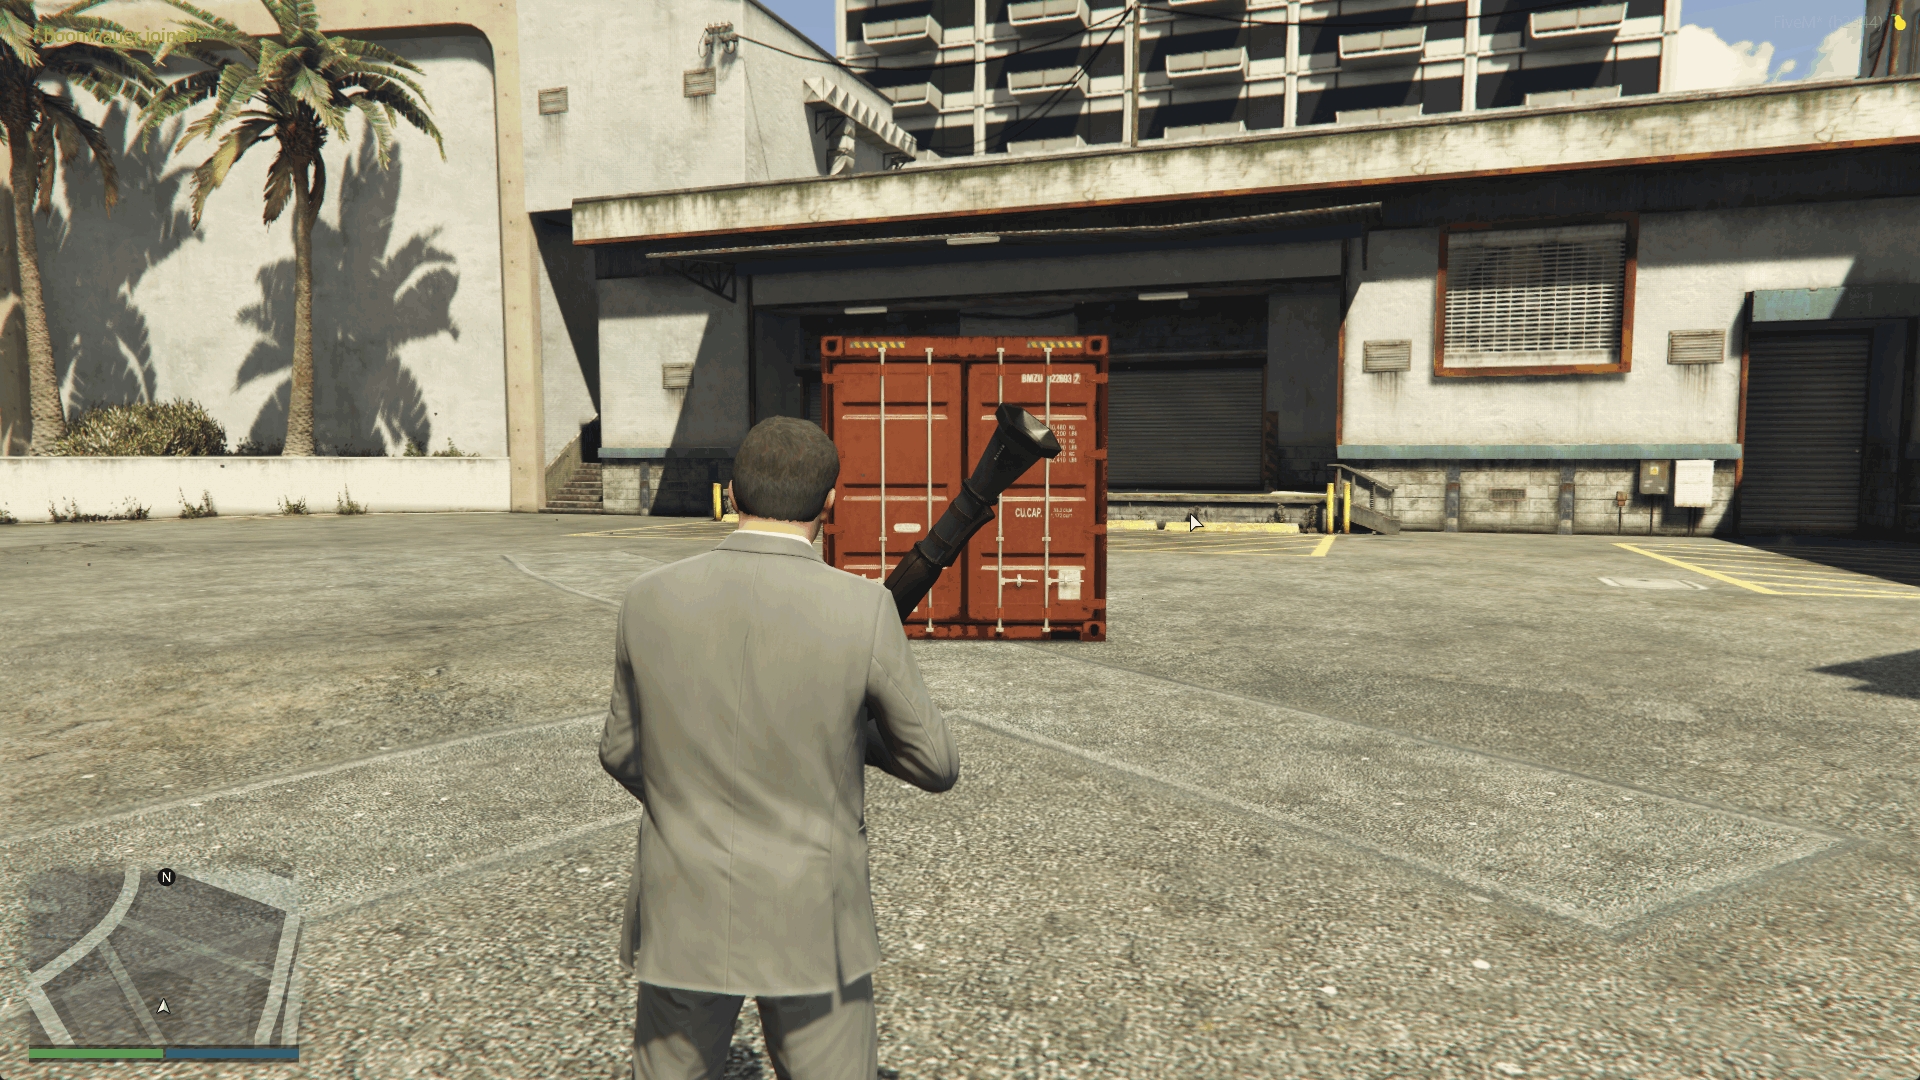
Strength is what determines how easily the part can be separated. If strength is -1, the part will not separate, but will still react to physics. This can be seen in props with hinging doors such as the container prop shown in Prop Setup.
Fragments are objects that contain separable parts and react to physics. These objects are typically used in breakable props (i.e. street lamps) and vehicles. The file contains a Drawable and a Composite (collision), and sometimes multiple of each if there is a destroyed variant such as in gas tanks. However, Sollumz does not currently support editing destroyed variants of Fragments.
It's recommended that you read the documentation page on Drawables and collisions first, as Fragments are made up of these objects.
The file layout for Fragments is quite complex, even with the simplified layout shown above (if you wish to see the full file layout, just open a yft.xml). However, you don't need to understand how the file works internally to understand how it works in Sollumz.
The Fragment contains a main Drawable as well as a Physics section which contains the collisions and physics data. PhysicsGroups contains groups of physics data where each group is linked to a bone. This is essentially the physics properties for each bone. PhysicsChildren contains physics data for each collision (i.e. mass, inertia). Each physics child belongs to a PhysicsGroup, and multiple children can belong to a single group.
You'll also notice there is a VehicleGlassWindows section. As the name implies, this is where data relating to vehicle windows are stored. Non-vehicle fragments can also have GlassWindows, but that is not currently supported by Sollumz.
Finally, there are Lights, which, just like Drawables, contain any lights that the Fragment might have (only ever used in prop Fragments).
The Blender hierarchy for Fragments is quite simple. The Fragment object itself is an armature with a Bound Composite and Drawable parented to it. The Fragment can also contain lights. Lights are typically stored in an empty object called "Lights", but can also be stored loosely in the Fragment or under the Drawable. It's up to you where to store the lights, as, during export, it will search all children (recursively) for lights. The hierarchy for the Bound Composite and Drawable is exactly the same.
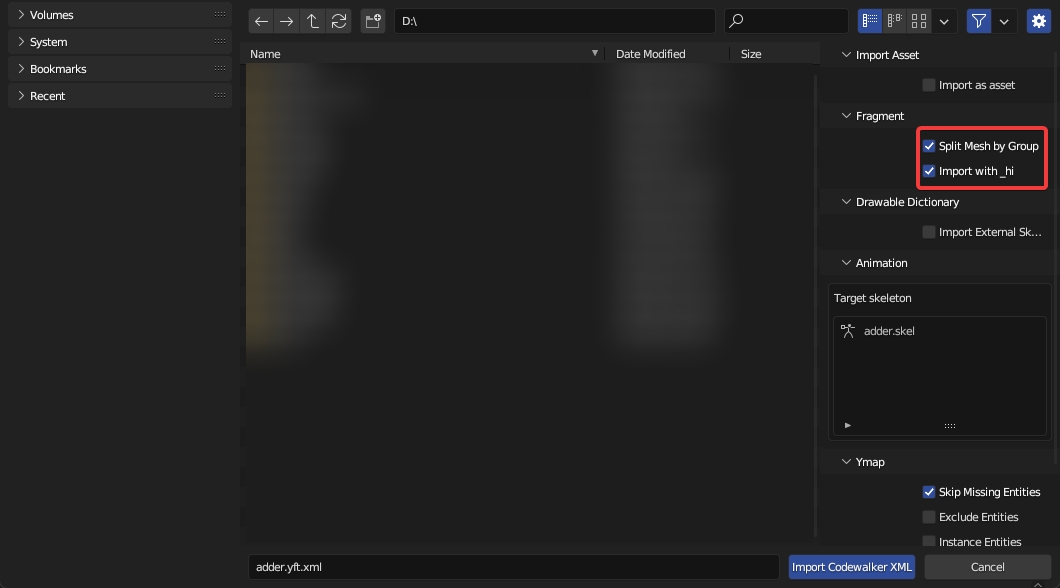
There are two import settings that determine how Fragments import: Split By Group and Import with _hi.
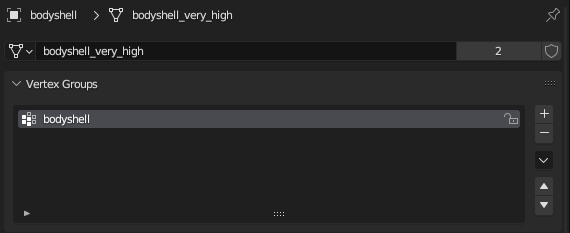
Split By Group will split the Drawable by vertex group. This is typically what you want when editing vehicles, as vehicles are skinned (i.e. rigged with weighted vertex groups), so there is typically only one Drawable Model containing many vertex groups as opposed to multiple Drawable Models each linked to a bone (see Drawables > Rigging > Skinning for more info on rigging Drawables).
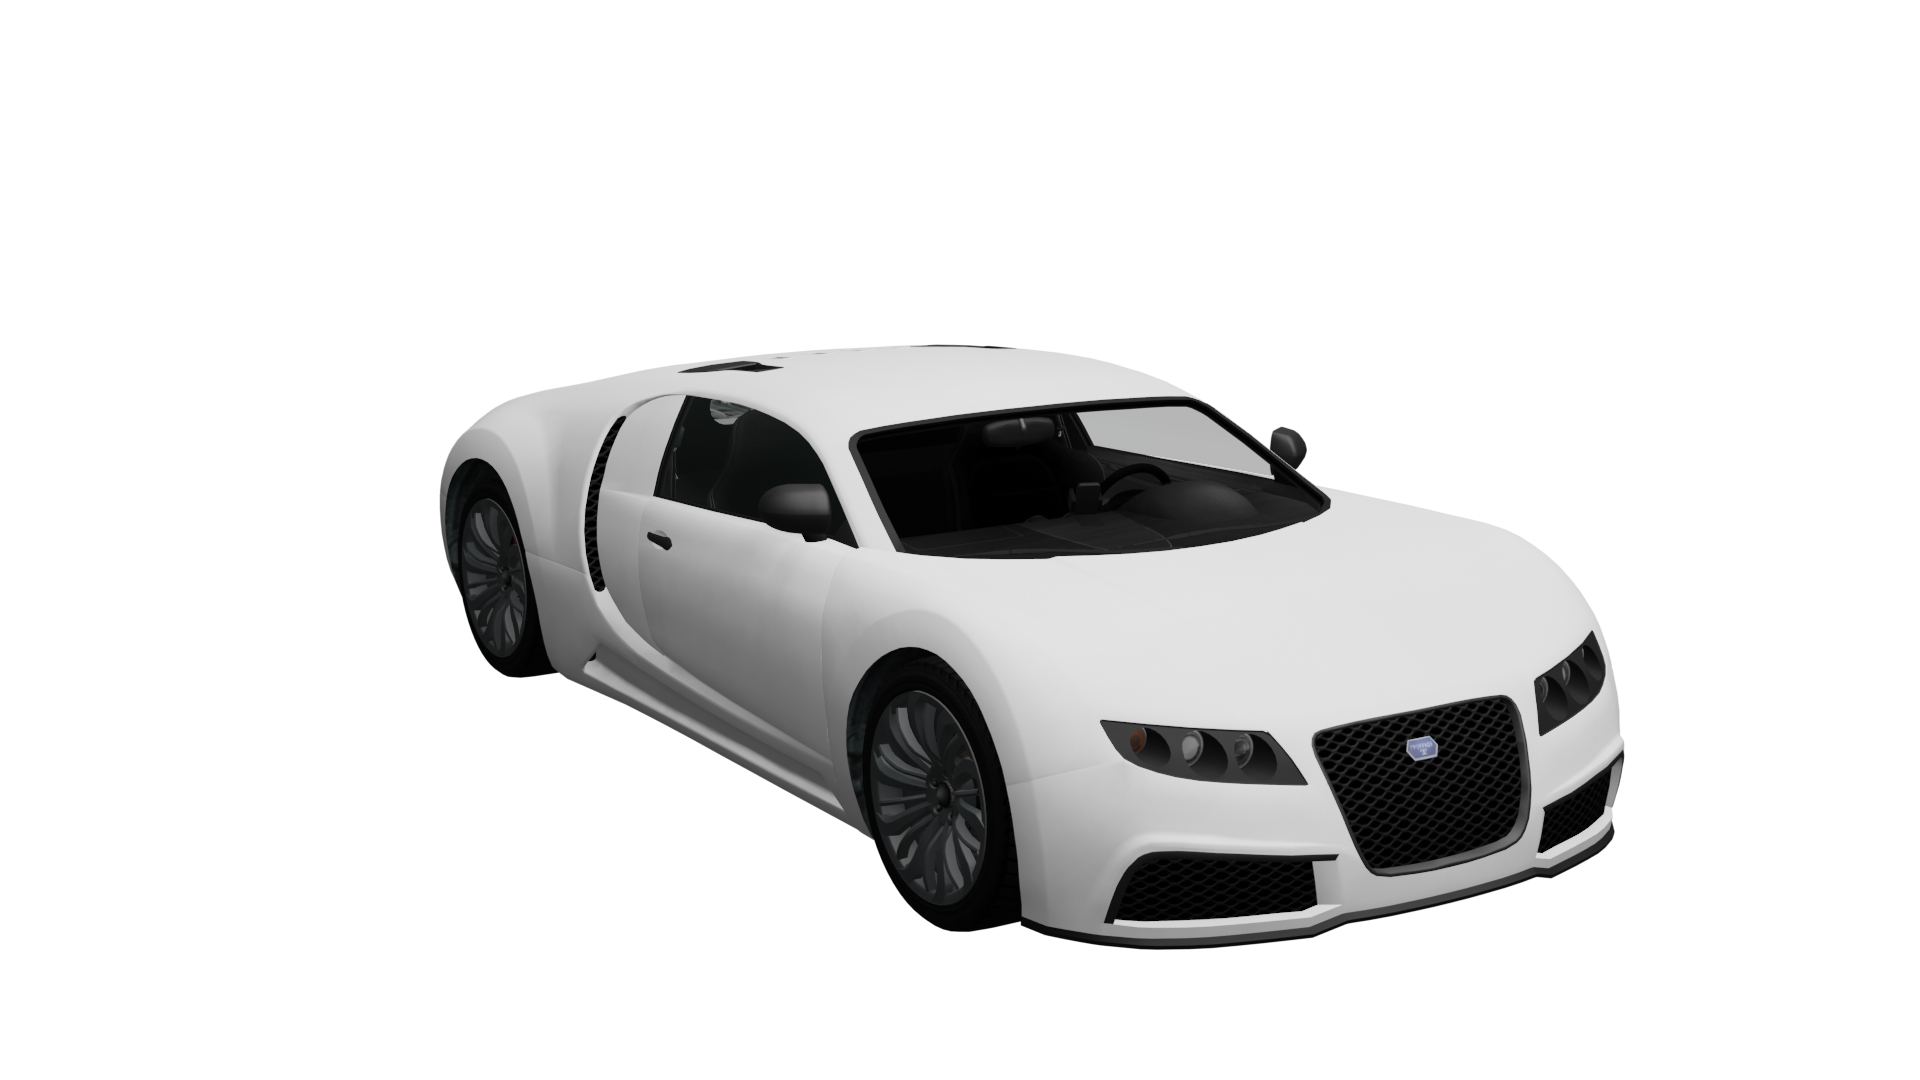
Here is what adder.yft looks like when split by group.
Notice how each object represents a separable part of the vehicle. Since it's split by vertex group, each object will only have one vertex group.
While the Drawable is initially set up with one vertex group per object, it is perfectly fine for an object to contain multiple vertex groups.
Each object also has an armature modifier with the Fragment as the target object.
Vehicle Fragments have an additional LOD level that is stored in a separate file named <fragment name>_hi.yft. For adder, it would be called adder_hi.yft. This is the highest level of detail and is what the player sees when close to the vehicle (i.e. when driving). It is very cumbersome to work on two separate YFTs so Sollumz stores this extra LOD level in the Very High LOD level. This enables you to work on both YFTs at once.
You should only use this LOD level when working with vehicles. When a mesh is provided for the Very High LOD level, Sollumz will export an extra _hi YFT that you don't need when working on props.
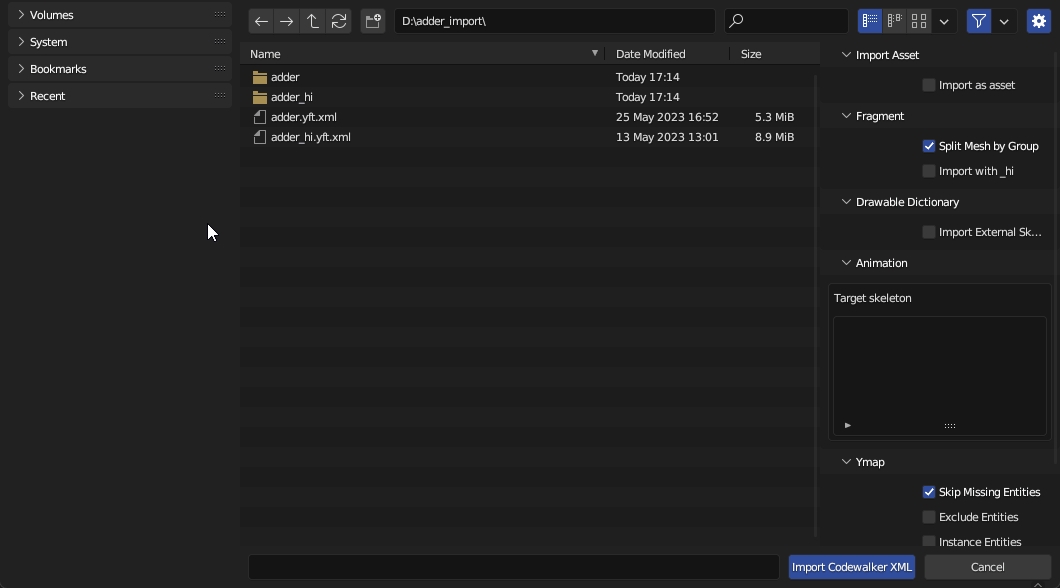
To import Very High LODs, first enable the Import with _hi option in the import settings panel, and ensure the _hi YFT is in the same directory as the non-hi YFT. Then, select the non-hi YFT and import.
As with any Fragment/Drawable, if you want the textures to be automatically imported with the mesh, ensure you extract all textures to a folder with the same name as the Fragment in the same directory.
Each separable part of a Fragment must have an associated collision object in order for physics to work. This means each bone with Use Physics enabled should also have a collision object linked to it.
You link collisions to bones the same way you link Drawable Models to bones as described in Drawables (.ydr) > Rigging.
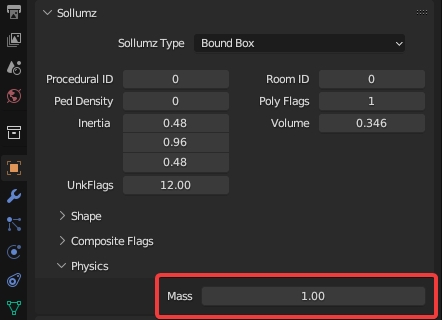
Each collision object under a Fragment also has a Physics subpanel where you can define its mass.
There is also a tool for automatically calculating mass based on the collision material's density and the object's volume. Navigate to Sollumz Tools > Fragment > Set Mass. There you will find the Calculate Collision Mass tool.
In order for this tool to work, the collision object must have a collision material added.
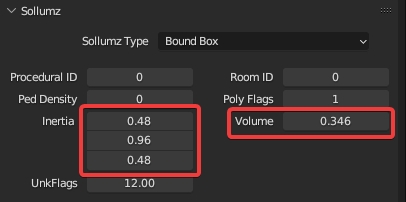
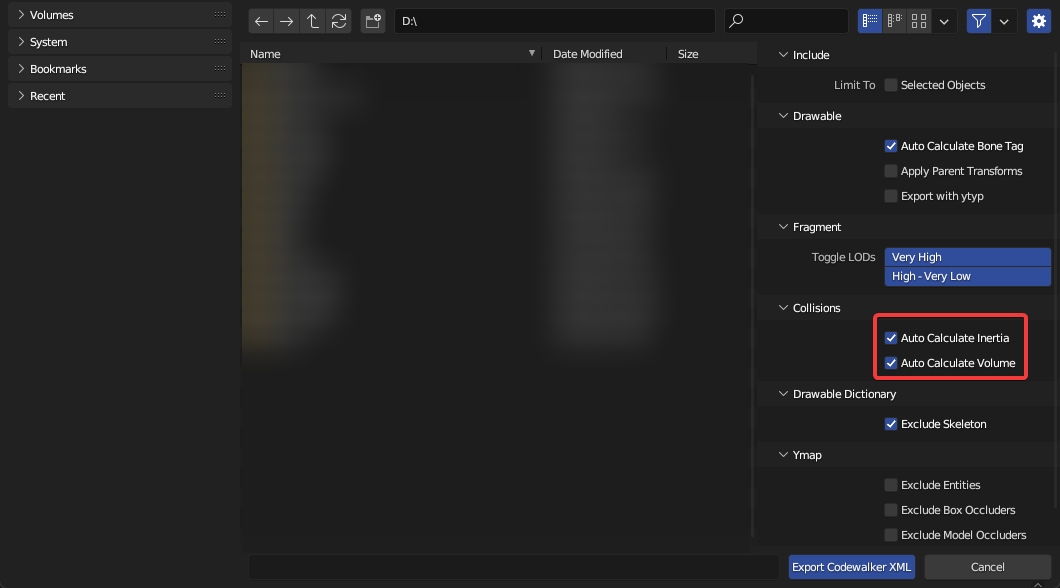
Volume and Inertia are essential physics properties for collisions. You can find these options under Object Properties > Sollumz.
Typically when creating completely custom collisions, you would auto-calculate these values during export, as calculating these involves a lot of math relating to the dimensions and shape of your collisions.
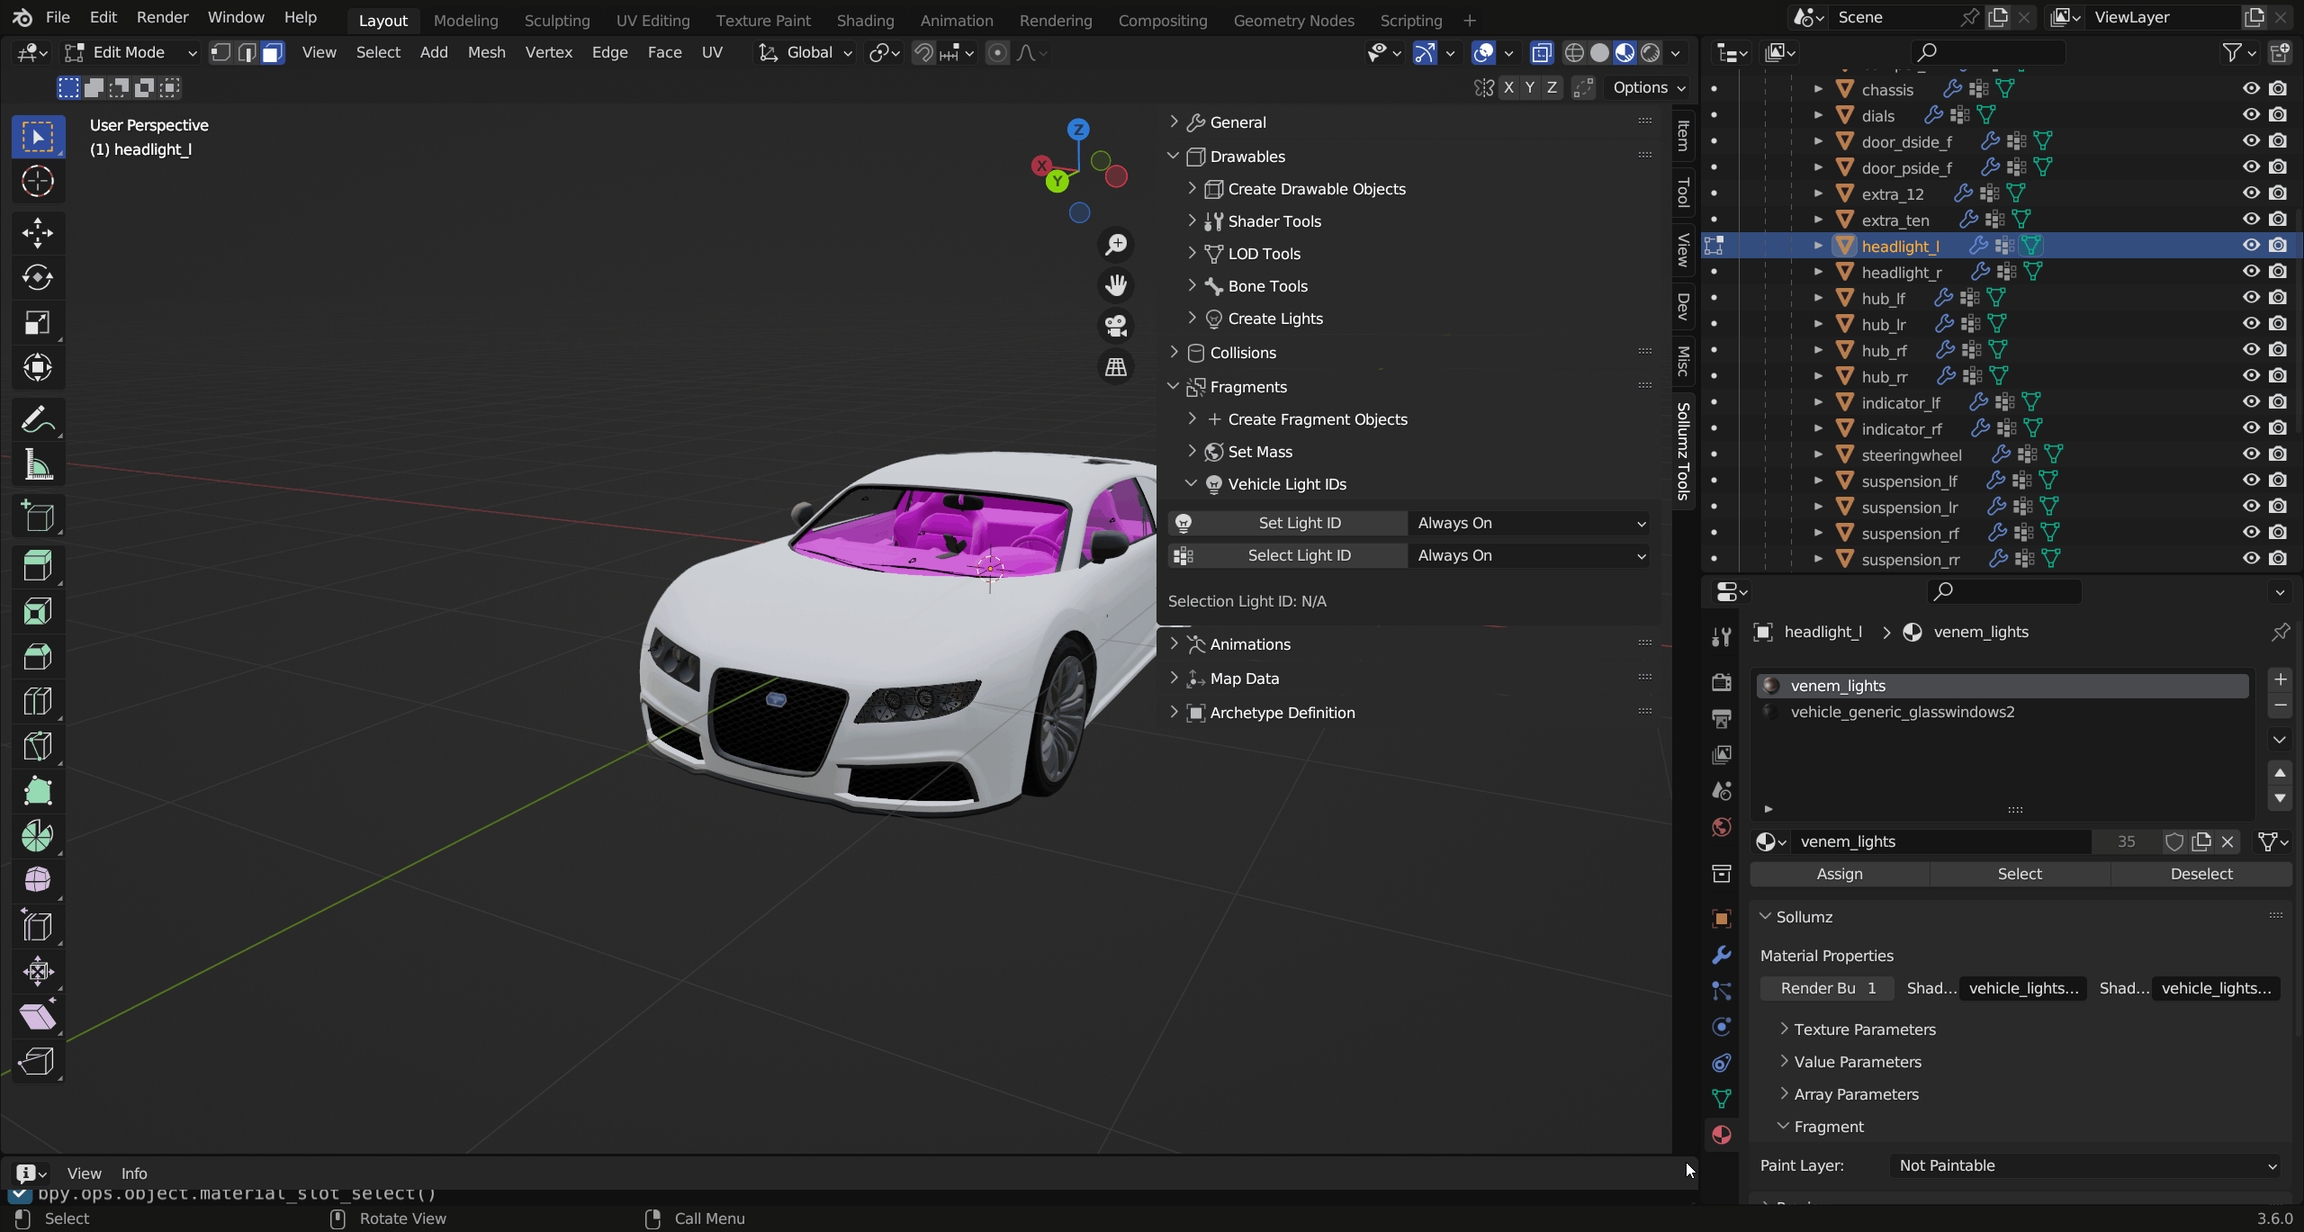
Any mesh with vehicle_lightsemissive shaders will appear always emissive in-game unless light IDs are assigned. Assigning light IDs allow you to make some faces only appear emissive under certain conditions (i.e. headlights on/off). Sollumz makes assigning light IDs easy.
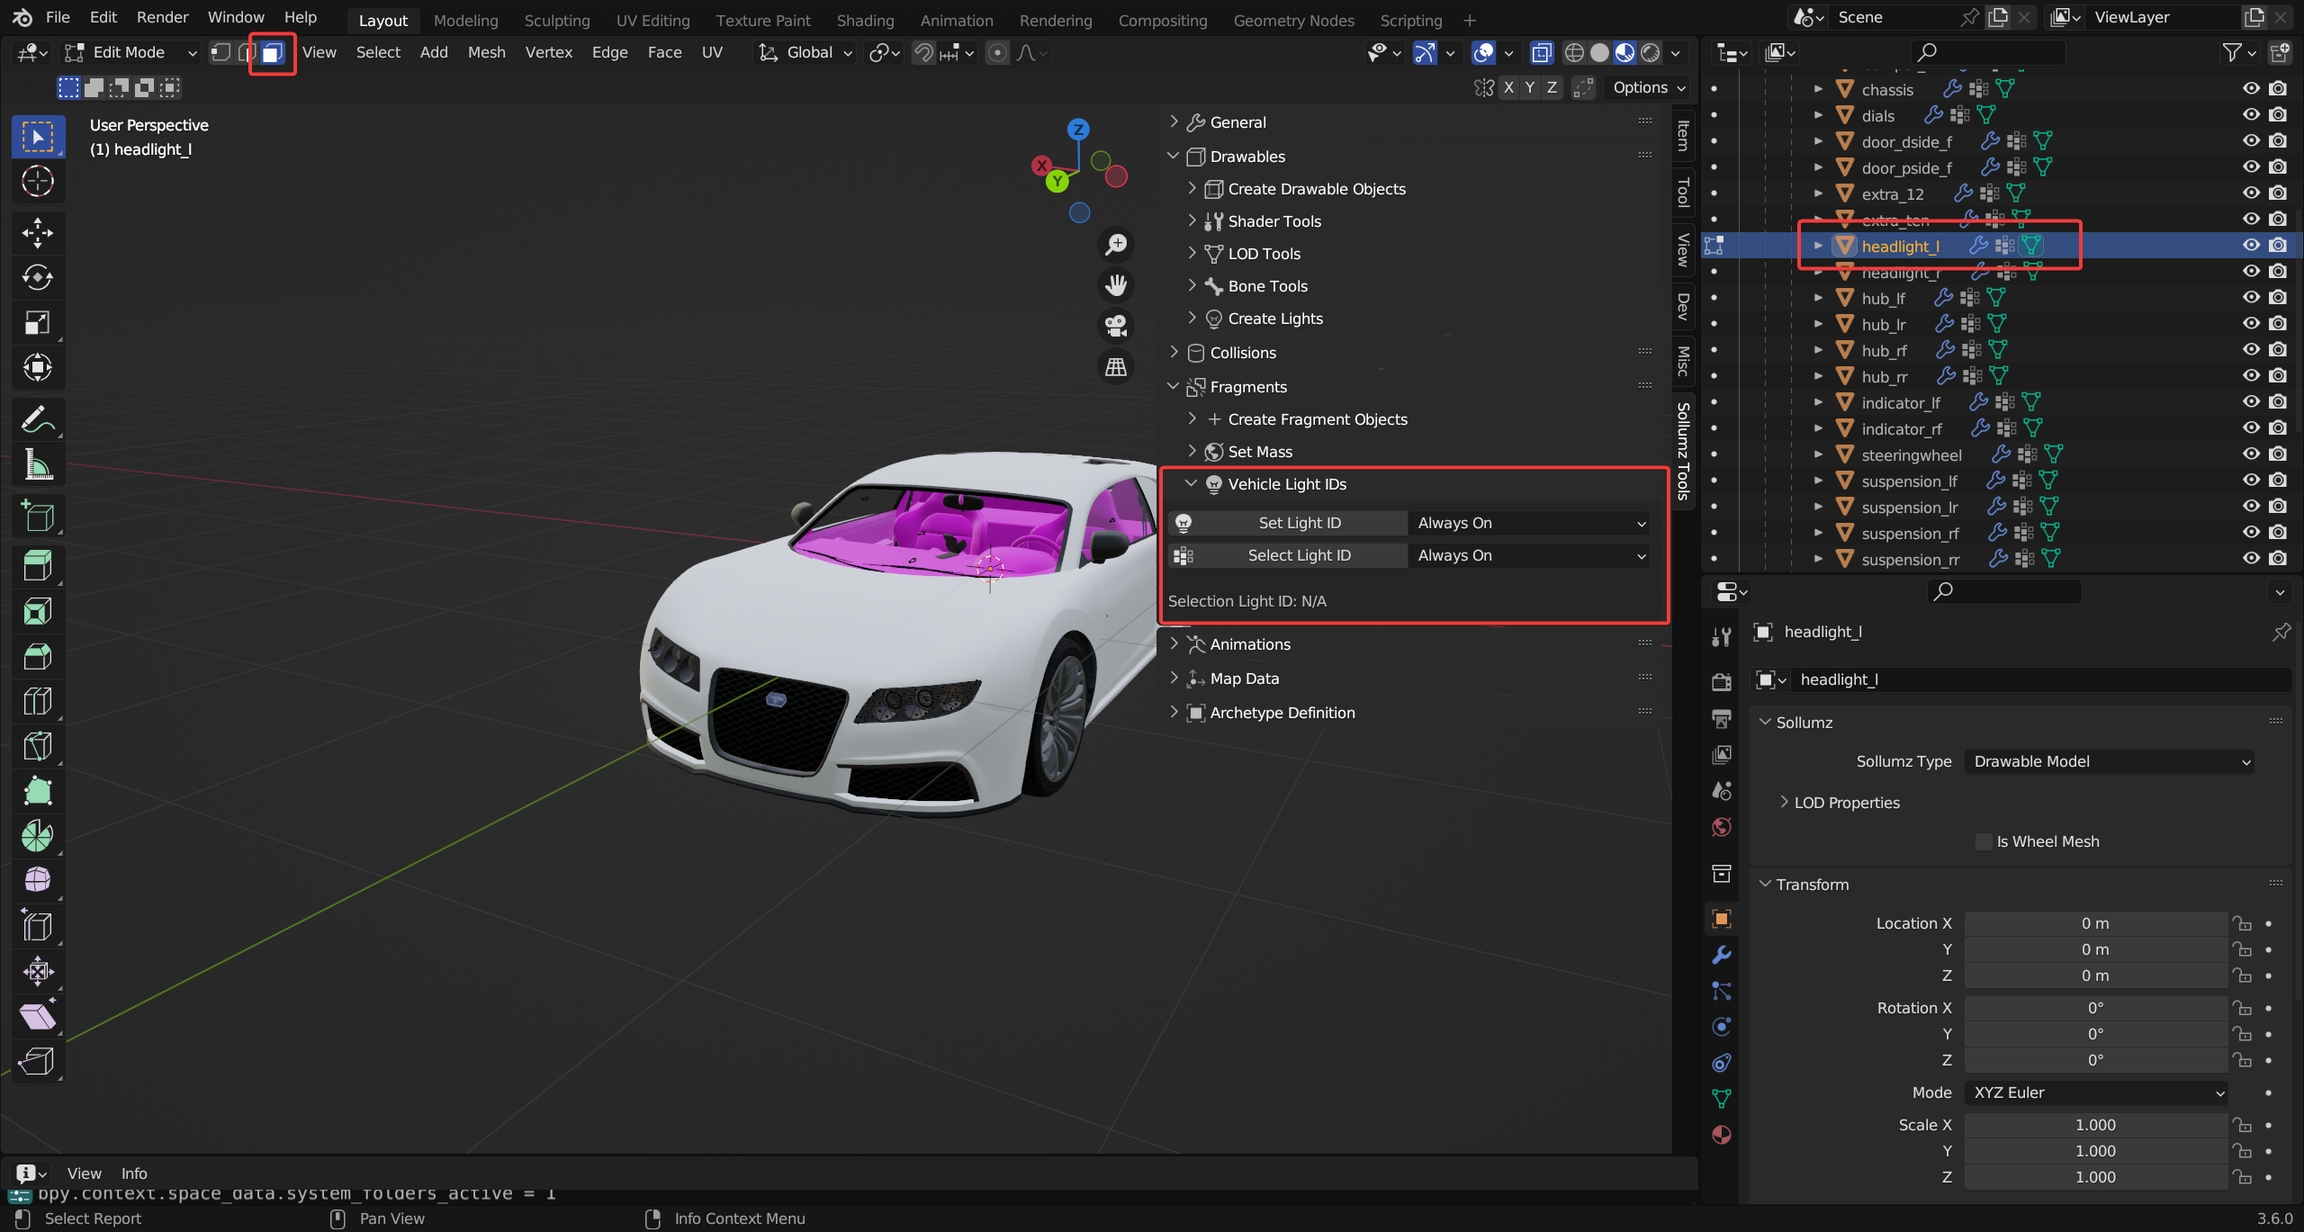
With a headlight object selected, enter Edit Mode in Face Selection mode and navigate to the Sollumz Tools > Fragment > Vehicle Light IDs panel.
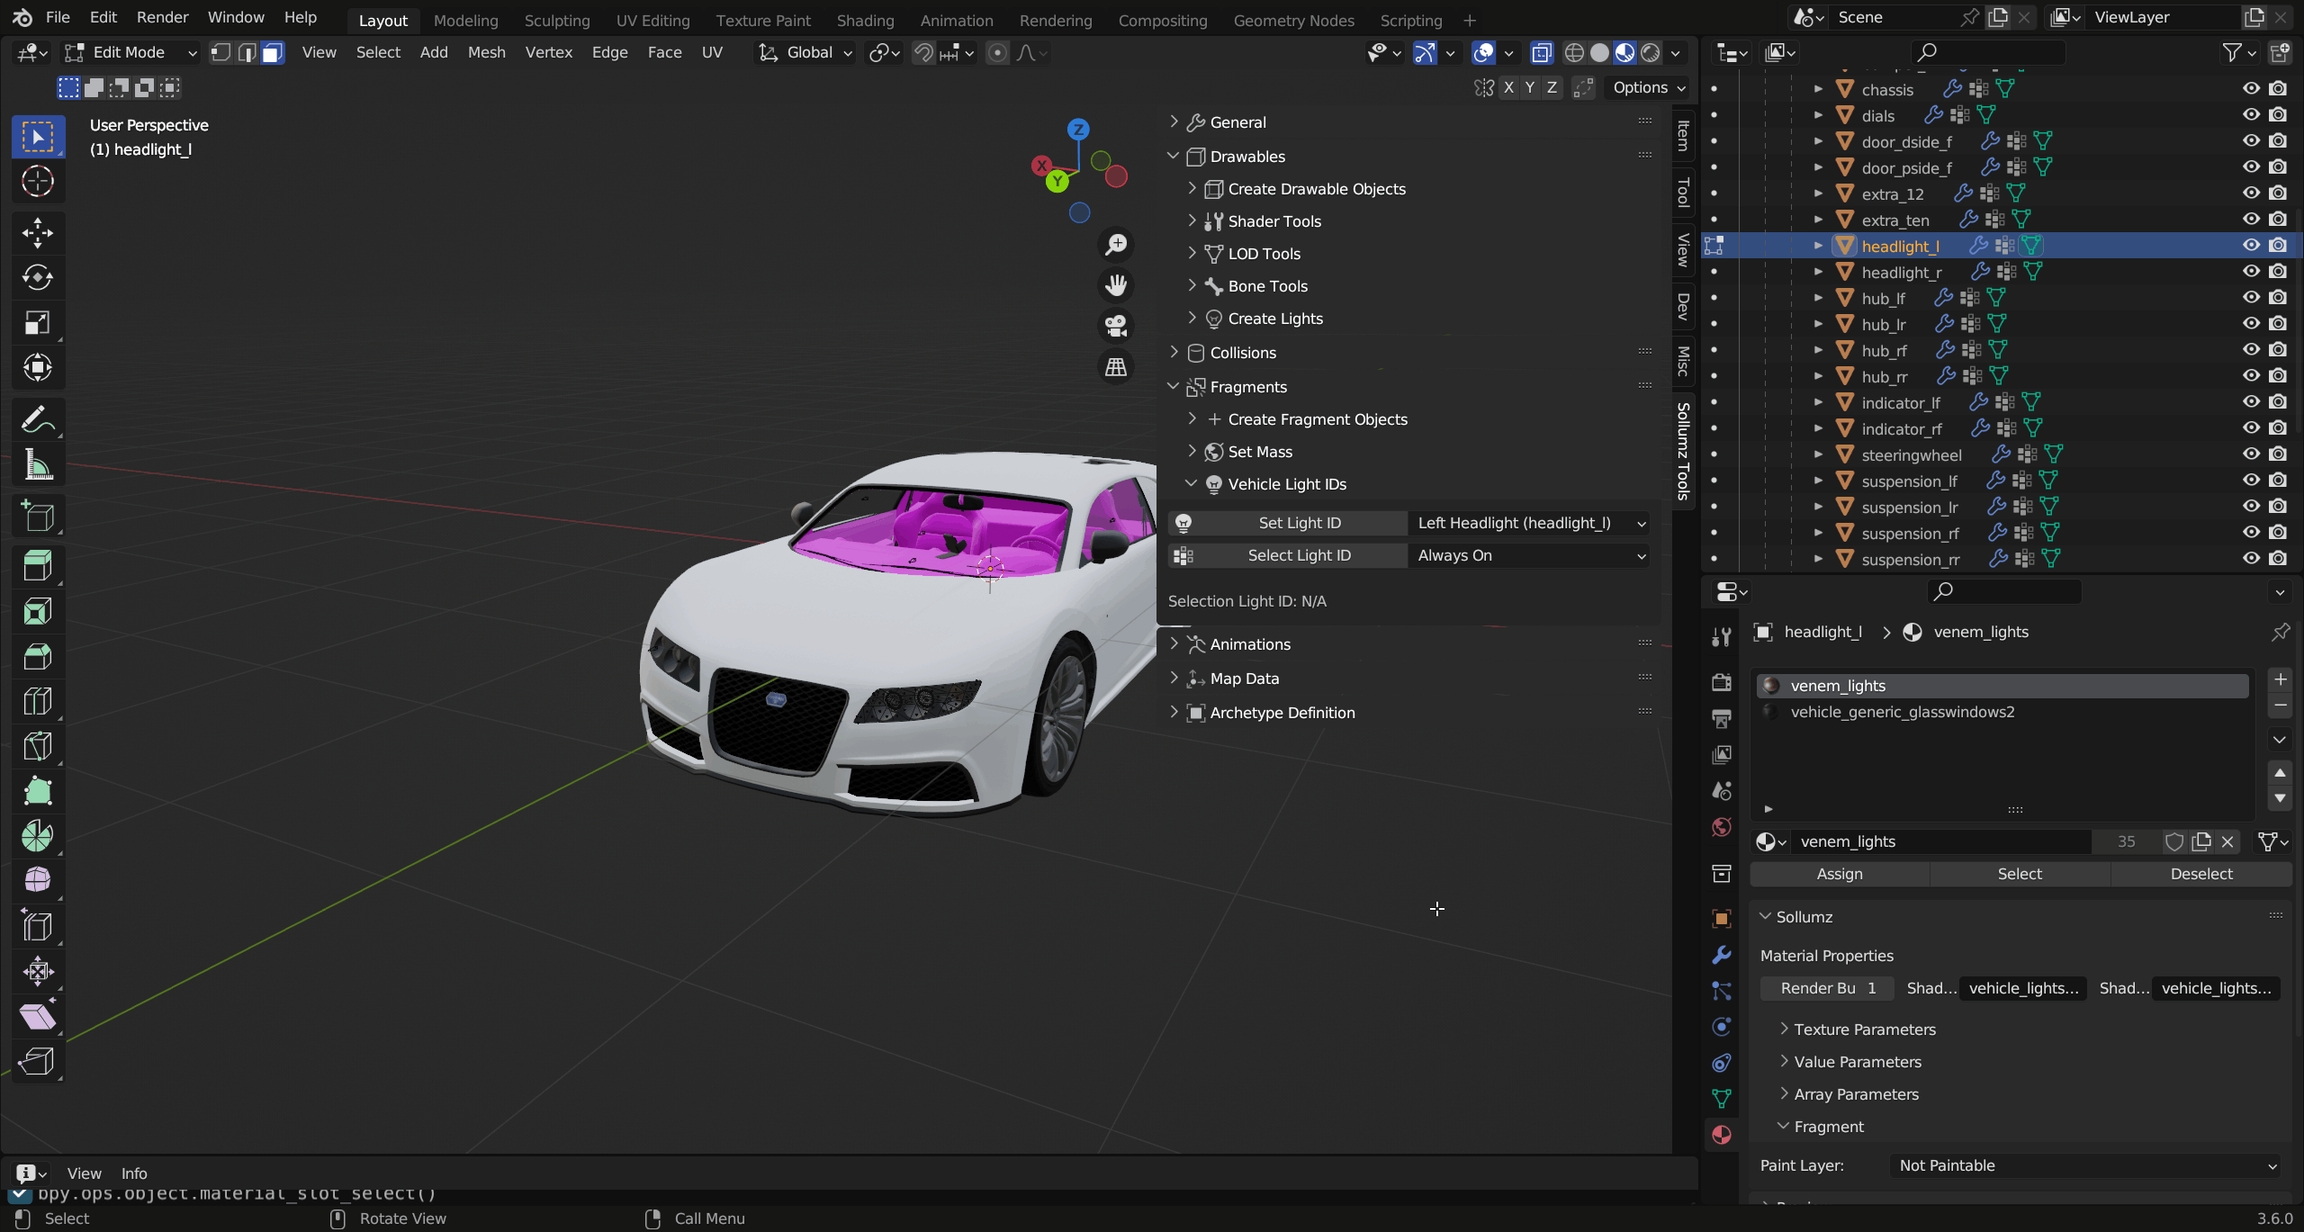
Select the faces of the left headlight that use the emissive shader, then set its light ID to headlight_l.
Notice now that if you unselect those faces, and select the headlight_l light ID, it will select those faces you just assigned.
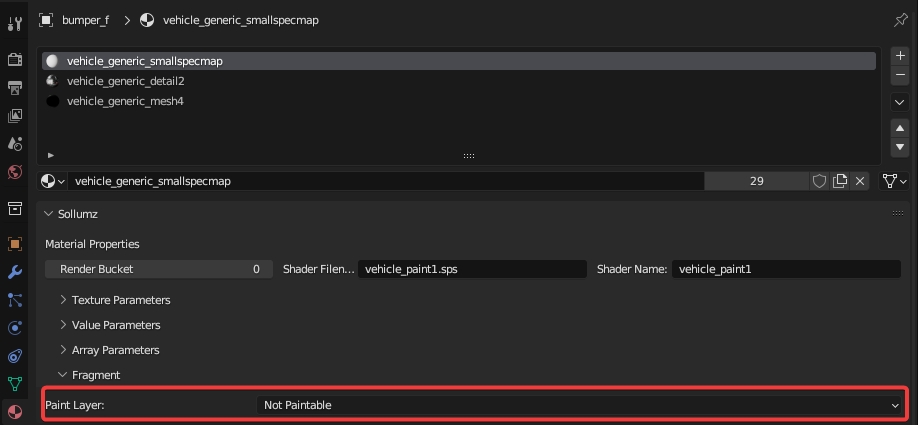
Paint colors allow you to determine which materials represent the Primary color, Secondary color, Wheel color, Interior Trim color, and Dashboard color. To select the paint color for a material, navigate to Material Properties > Sollumz > Fragment.
By default it will be "Not Paintable", meaning the shader will not be affected by any paint color.
Not all shaders are paintable. If you are trying to set up a paintable vehicle material and you are getting the "Not a paint shader" message, then you need to use a different shader. Typically you'd want to use a vehicle_paint shader for the body of a vehicle.
Vehicle windows are defined in the physics properties of the window collision. See window_lf.col in adder.yft for example.
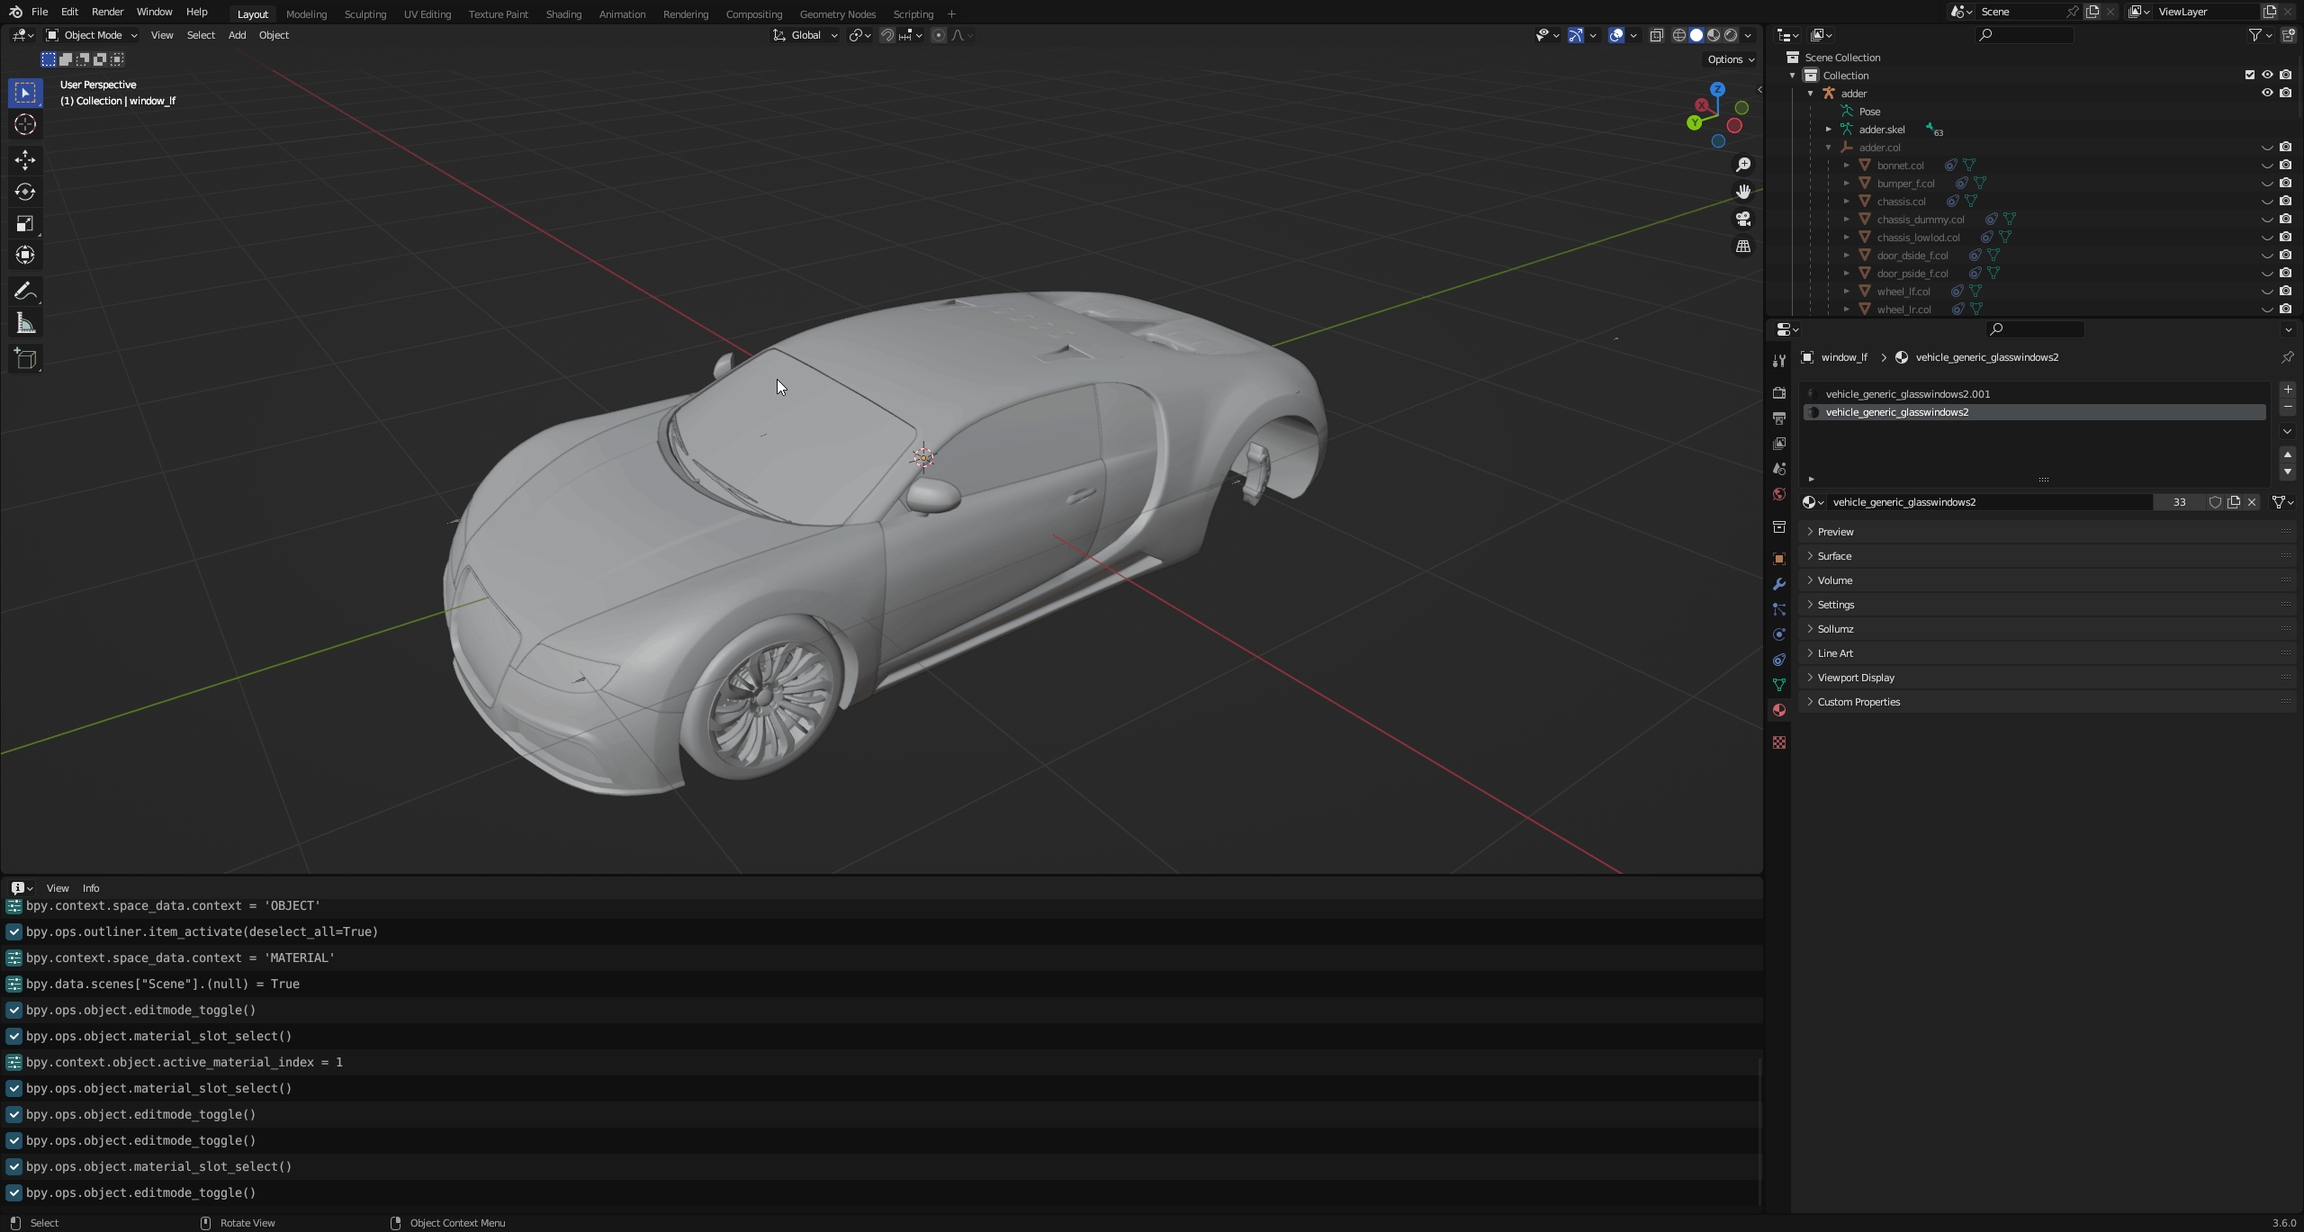
Enabling Is Glass Window will cause the window properties to appear. The only property you should have to change here is the Window Material. This is the material that the corresponding window mesh uses. Looking at the window_lf mesh materials, we see that it uses two vehicle_generic_glasswindows2 materials.
This is because one material represents the inner glass and the other represents the outer glass. Go into Edit Mode and select the vertices of each material to see which one represents the outer glass. In this case, it's the material without the ".001" so that's the one that the glass window should reference.
That's all that is needed for working vehicle windows!
You will notice that all vanilla vehicles have "shattermaps", which is an image that defines the border of the glass-breaking pattern. These aren't 100% necessary for working vehicle windows but will result in better-looking glass shatter patterns.
In Sollumz, shattermaps are represented as planes with a single texture. For example, adder.yft has an object called windscreen_shattermap which is parented to windscreen.col.
These are always low-res bitmap greyscale textures. Currently, Sollumz has no tools for creating shattermaps, so your best bet is to copy shattermaps from vanilla files and work off of those.
Upon importing, you will notice that the vehicle has only one wheel. This is because the game instances (re-uses) wheel_lf for all other wheels.
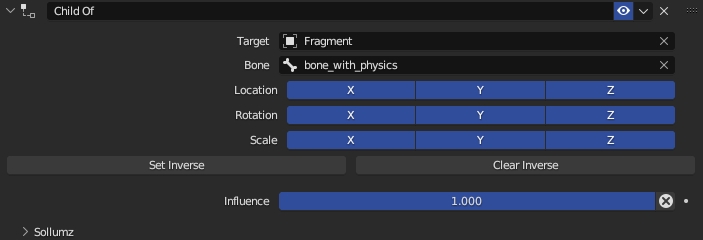
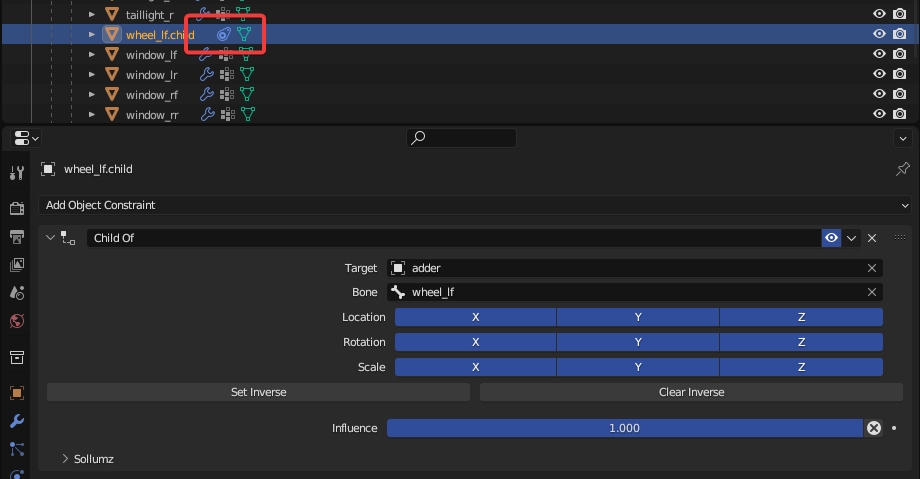
Wheel meshes do not have vertex groups but are instead rigged by a Child Of Constraint (as explained in Drawables > Rigging).
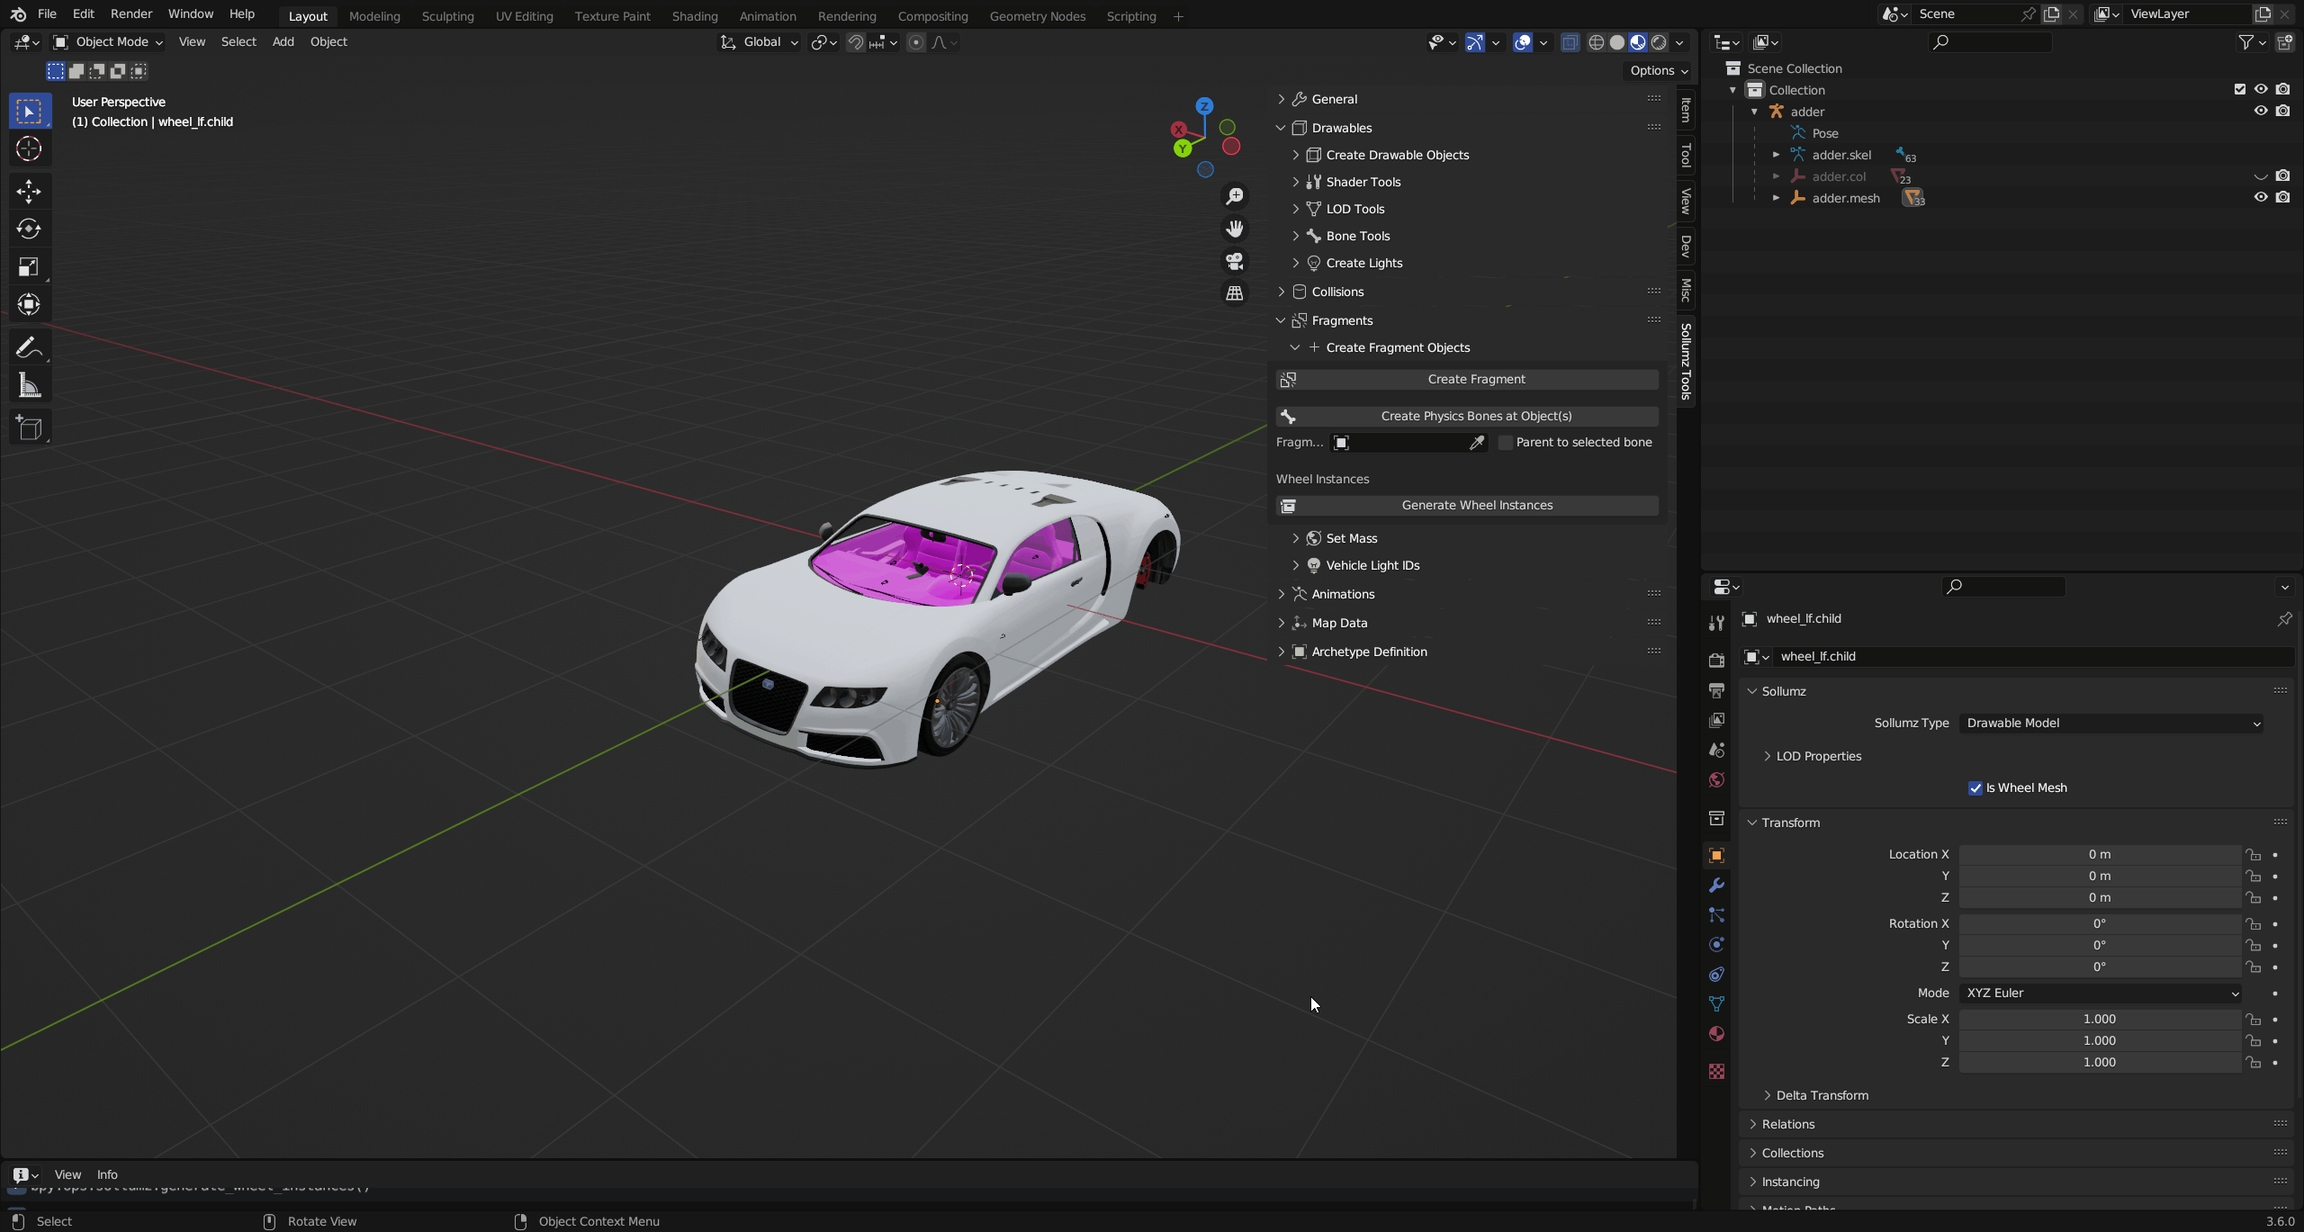
Also, wheel meshes have the Is Wheel Mesh property ticked under Object Properties > Sollumz.
That's all that's needed for setting up wheel meshes!
In Sollumz Tools > Fragment > Create Fragment Objects is a tool called Generate Wheel Instances. This tool will create instances of the wheel, allowing you to better preview what it looks like in-game. This is useful when positioning the wheel bones.
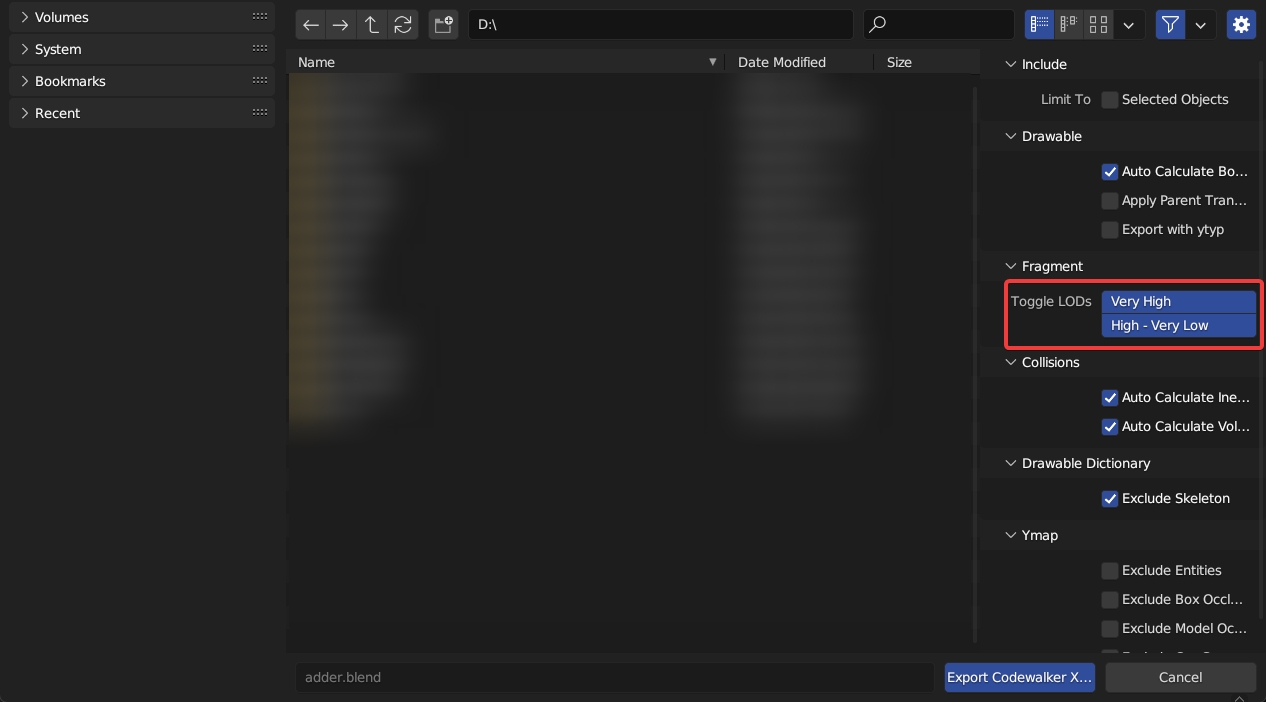
In the Export Codewalker XML > Fragment panel, you will find the Toggle LODs option.
This allows you to export just the hi YFT, just the non-hi YFT, or both at the same time.
In this page you can find all vehicle shaders used on vehicles and their technical usage
vehicle_paint1
Texture samplers: Diffuse, Dirt, Specular / DiffuseSampler, DirtSampler, SpecSampler
UV Maps: UV Map 0 - Diffuse/Specular UV Map 1 - Dirt
vehicle_paint1_enveff
Texture samplers: Diffuse, Snow Sampler 0, Snow Sampelr 1, Dirt, Specular / DiffuseSampler, SnowSampler0, SnowSampler 1, DirtSampler, SpecSampler
UV Maps: UV Map 0 - Diffuse/Specular UV Map 1 - Dirt Vertex Alpha: visibility of snow samplers
vehicle_lightsmeissive
Texture samplers: Diffuse, Dirt, Specular / DiffuseSampler, DirtSampler, SpecSampler
UV Maps: UV Map 0 - Diffuse/Specular UV Map 1 - Dirt
todo
vehicle_interior
Texture samplers: Diffuse, Specular / DiffuseSampler, SpecSampler
UV Maps: UV Map 0 - Diffuse/Specular
vehicle_interior2
Texture samplers: Diffuse, Specular / DiffuseSampler, SpecSampler
UV Maps: UV Map 0 - Diffuse/Specular
vehicle_mesh
Texture samplers: Diffuse, Dirt, Bump, Specular / DiffuseSampler, DirtSampler, BumpSampler, SpecSampler
UV Maps: UV Map 0 - Diffuse/Bump/Specular UV Map 1 - Dirt
vehicle_tire
Texture samplers: Diffuse, Dirt, Bump, Specular / DiffuseSampler, DirtSampler, BumpSampler, SpecSampler
UV Maps: UV Map 0 - Diffuse/Dirt/Bump/Specular
vehicle_dash_emissive
Texture samplers: Diffuse, Specular / DiffuseSampler, SpecSampler
UV Maps: UV Map 0 - Diffuse/Specular
vehicle_dash_emissive_opaque
Texture samplers: Diffuse, Specular / DiffuseSampler, SpecSampler
UV Maps: UV Map 0 - Diffuse/Specular
vehicle_licenseplate
Texture samplers: Dirt, Plate background, Place background bump, Font, Font bump / DirtSampler, PlateBgSampler, PlateBgBumpSampler, FontSampler, FontNormalSampler
UV Maps: UV Map 0 - Plate background, Place background bump, Font, Font bump UV Map 1 - Dirt
vehicle_badges
Texture samplers: Diffuse, Bump, Specular / DiffuseSampler, BumpSampler, SpecSampler
UV Maps: UV Map 0 - Diffuse/Bump/Specular
vehicle_decal
Texture samplers: Diffuse, Specular / DiffuseSampler, SpecSampler
UV Maps: UV Map 0 - Diffuse/Specular
vehicle_detail2
Texture samplers: Diffuse, Detail, Specular / DiffuseSampler, DetailSampler, SpecSampler
UV Maps: UV Map 0 - Diffuse/Bump/Specular UV Map 1 - Detail (tileable)
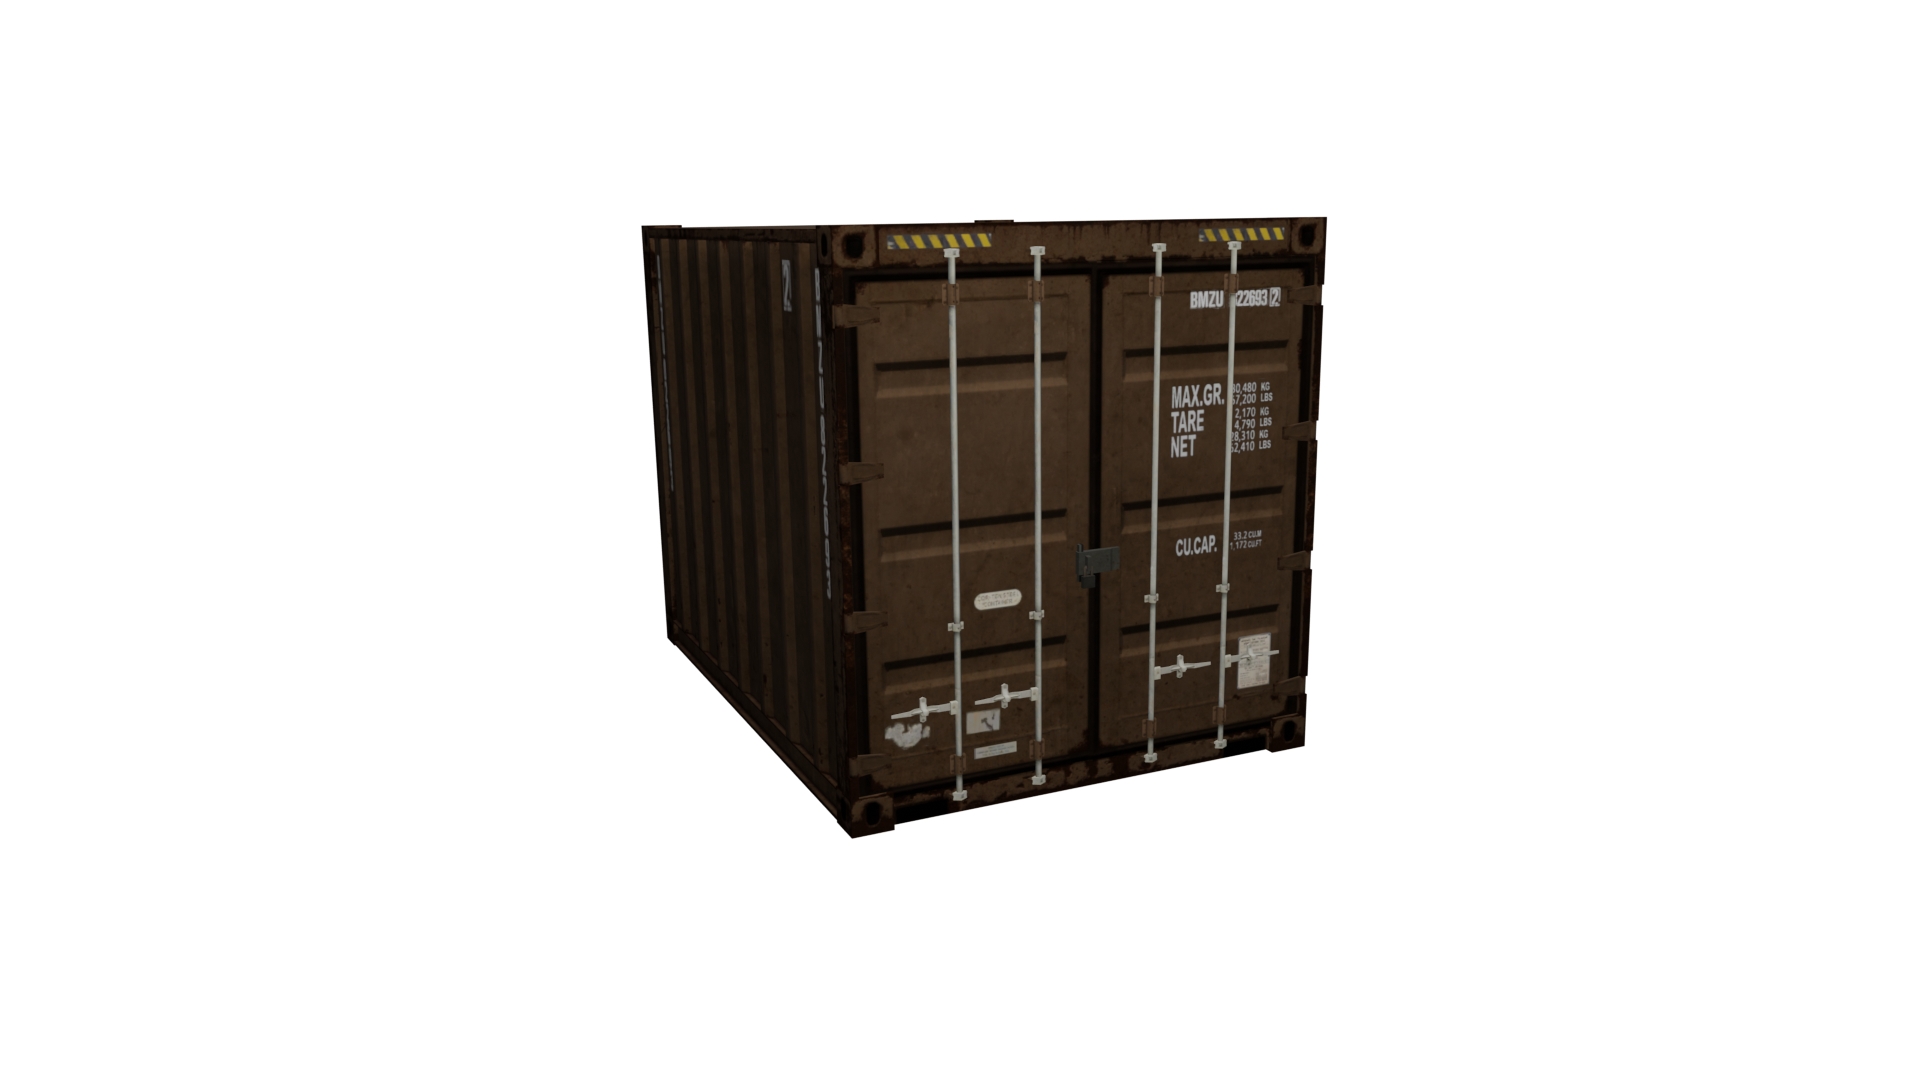
The example prop used in this article is prop_container_05a.yft
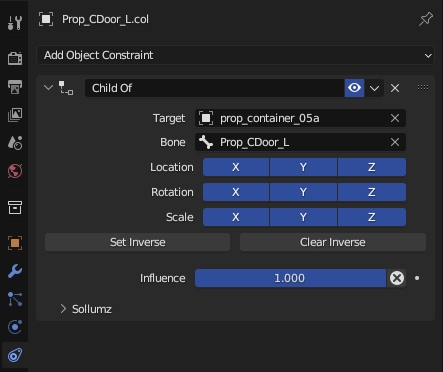
You'll also notice that each Drawable Model is rigged using a Child Of constraint instead of vertex groups.
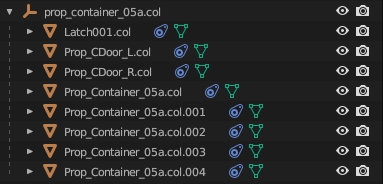
This is the case for all props. Typically each Drawable Model for a prop corresponds to a particular separable part of the Fragment. Notice there is a Drawable Model for the latch, each door, and the container itself.
This matches up with the bone hierarchy.
Each bone is parented to Prop_Container_05a and is thus affected by that bone. Every skeleton in the game engine always has one root bone that all the other bones are parented to.
If you attempt to add multiple top-level bones (bones with no parent) you will run into issues. Make sure there is a single "root" bone that all other bones are parented to!
Notice, too, that each bone has Use Physics enabled. This means that each of those parts will have physics in-game and will separate from each other.
In this case, the doors don't actually "separate" from the mesh, but fling open instead. This is because the Strength bone physics property is set to -1. When set to another value (i.e. 100) you'll notice that the parts will separate.
As mentioned before, each bone with physics enabled must have an associated collision. However, there can be multiple collisions for a single bone. Notice for this prop, there is a single collision for the latch and the doors, but the container itself is comprised of 5 box collisions.
You will notice that a lot of vanilla collisions will use bound shapes wherever possible. This is typically preferred over using a bound mesh as it is much more performant. Keep collisions as simple as possible.
Each of these collision objects is linked to a bone via a Child Of Constraint.
Each collision also has its mass set in the Object Properties > Sollumz > Physics panel.
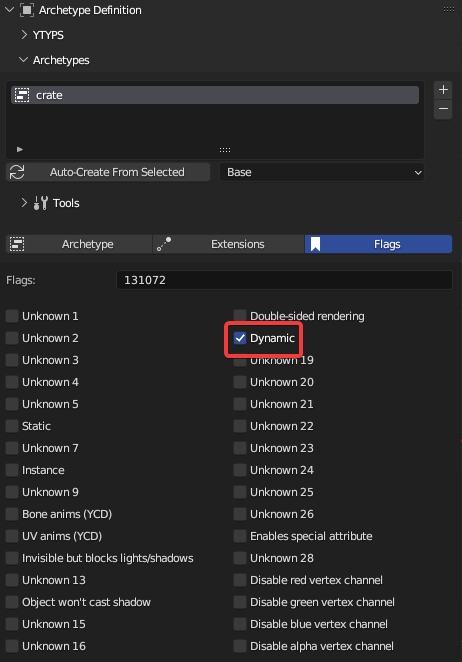
In order for physics to work for your prop in-game, make sure the YTYP archetype has the "Dynamic" flag enabled!

